How to Add cool Lottie Animations to Your Flutter App

Software developer with 6+ years of overall software development experience with focus on mobile application development. Proficient with the use of Flutter and native android SDK, have experience using CI / CD platforms, deploying apps to the play store, creating and consuming REST and GraphQL endpoints, working with databases (SQLite, Postgres, Mongo), designing highly scalable and testable code that conforms to the Model View ViewModel (MVVM)Architecture or the Clean Architecture. Most of all, love to build aesthetically pleasing Apps
Today we're going Learn how to Add cool Lottie Animations to Your Flutter App. But before we get any further.
What is Lottie
According to their Website A Lottie is a JSON-based animation file format that enables designers to ship animations on any platform as easily as shipping static assets. They are small files that work on any device and can scale up or down without pixelation.
Why should I use it in my Application
- Lottie Animations Are usually Smaller in Size Than their Gifs and Mp4 counterparts. Thereby saving saving your App some space
- Unlike Gifs and other animation formats, Lottie animations have a transparent background (they're like the PNG of animations) 😁 Hence they blend well with your app background
- As someone that has no design experience (like myself), you can easily modify Lottie animation colors to suit your project needs
- LottieFiles.com has a ton of Free!!! Animation Designs you can use freely for your projects (required you give credits to the designer)
- They're are just so cool... 😉
With these few points of mine, I hope I have not confused but convinced you as to why you should Lottie Animation in your flutter app
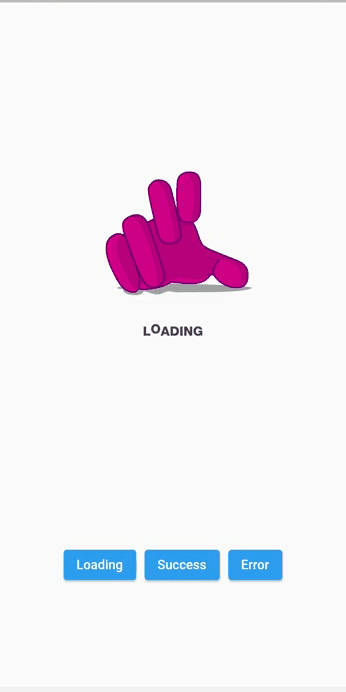
Let's Get Started Here's a Demo of the App we will be building
And here's a link to the Github Repo
After setting up our Flutter project, we are going to add the Lottie Plugin to our pubspec.yaml file
dependencies:
  flutter:
    sdk: flutter
  lottie: ^1.0.1
Add Lottie files to the assets folder
Download required Lottie JSON files and put them inside the assets folder and configure those files in pubspec.yaml file
Example
assets:
  - assets/loading.json
  - assets/success.json
  - assets/error.json
for the purpose of this tutorial, we will use a gif asset for the success animation instead of a JSON in order to illustrate the difference you get when you use a gif vs a JSON Lottie animation
next, create 3 files in your lib folder
loading.dart
success.dart
error.dart
each of these files represents the loading, success and error screens seen above. They're nothing more than a Scaffold and a Lottie widget (nothing complex)
copy the following code into your loading.dart file
import 'package:flutter/material.dart';
import 'package:lottie/lottie.dart';

class LoadingScreen extends StatelessWidget {
  @override
  Widget build(BuildContext context) {
    return Scaffold(
      body: Center(
        child: LottieBuilder.asset(
          "assets/loading.json",
           repeat: true,
        ),
      ),
    );
  }
}
also, error.dart
import 'package:flutter/material.dart';
import 'package:lottie/lottie.dart';

class ErrorScreen extends StatelessWidget {
  @override
  Widget build(BuildContext context) {
    return Scaffold(
      body: Center(
        child: LottieBuilder.asset(
          "assets/error.json",
          repeat: false, //causes the animation to only play once
        ),
      ),
    );
  }
}
as mentioned earlier, in our success.dart file, we will be using a gif animation. hence there is no need for the Lottie plugin here
import 'package:flutter/material.dart';

class SuccessScreen extends StatelessWidget {
  @override
  Widget build(BuildContext context) {
    return Scaffold(
      body: Center(
        child: Image.asset(
          "assets/success.gif",
        ),
      ),
    );
  }
}
To put everything together, go to your main.dart file and clear everything add the following code
import 'package:flutter/material.dart';
import 'error.dart';
import 'loading.dart';
import 'success.dart';

void main() {
  runApp(MyApp());
}

class MyApp extends StatelessWidget {
  @override
  Widget build(BuildContext context) {
    return MaterialApp(
      title: 'Flutter Demo',
      debugShowCheckedModeBanner: false,
      theme: ThemeData(
        primaryColor: Color(0xffdc143c),
      ),
      home: HomePage(),
    );
  }
}

class HomePage extends StatefulWidget {
  @override
  _HomePageState createState() => _HomePageState();
}

class _HomePageState extends State<HomePage> {
  PageController _pageController = PageController(initialPage: 0);

  @override
  Widget build(BuildContext context) {
    return Scaffold(
        body: Center(
      child: Column(
        children: [
          Container(
            height: MediaQuery.of(context).size.height * .8,
            child: PageView(
              controller: _pageController,
              children: [
                LoadingScreen(),
                SuccessScreen(),
                ErrorScreen(),
              ],
            ),
          ),
          Padding(
            padding: const EdgeInsets.symmetric(horizontal: 20),
            child: Row(
              mainAxisAlignment: MainAxisAlignment.center,
              children: [
                ElevatedButton(
                    onPressed: () {
                      _pageController.jumpToPage(0);
                    },
                    child: Text("Loading")),
                SizedBox(width: 10),
                ElevatedButton(
                    onPressed: () {
                      _pageController.jumpToPage(1);
                    },
                    child: Text("Success")),
                SizedBox(width: 10),
                ElevatedButton(
                    onPressed: () {
                      _pageController.jumpToPage(2);
                    },
                    child: Text("Error")),
              ],
            ),
          )
        ],
      ),
    ));
  }
}
in the main.dart file above, take a look at the HomePage widget which is the main view of the app. it contains a PageView widgets and three buttons... when clicked, each button jumps to a different screen that displays an appropriate Animation.
If you look at the Demo above closely, you'll notice that the Success screen has a totally white background white is somewhat different from the scaffolds. This is because it uses a gif instead of a JSON file
Conclusion : In the article, we talked about what a Lottie file is and why we should use it, we the went ahead to setup the Lottie plugin and added the Animation assets. Which we used to build our simple app.
I hope this article provides you with the basic information for setting up Lottie Animation in your flutter projects.
❤ ❤ Thanks for reading❤❤
If I got something wrong or something's not clear enough, Let me know in the comments. I would love to improve.
If this article has helped you in any way.. kindly react and share 🙂